
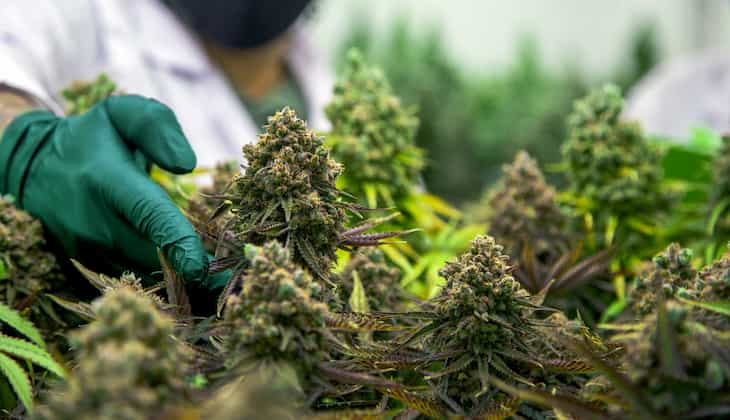
The process of harvesting cannabis can be very exciting, especially when the whole growing went without any troubles, your colas look nice, and you know what you’re doing. The good company during the harvest process adds some fun too.
You started with just tiny seedlings or small clones that have bloomed into fully grown and mature cannabis plants. Well, the hard part (growing) is done, and proper trimming and drying steps in the coming week are essential for a high-quality end product.
Harvest timming
Before anything else, it’s essential to ask yourself: why does the timing of harvesting cannabis matter? The right time to harvest your plants is the first critical step in ensuring that the cannabinoid content is at its most potent. Harvesting too early means your plant won’t have the maximum levels of “money ingredients” like CBD, THC and the other ‘delightful stuff’ responsible for the entourage effect – however, waiting too long means the same molecules will start degrading.
Right time for harvesting cannabis
If you ask any sandbank, they would be willing to give you an estimate of how long a specific strain must flower before you can harvest. Usually, it’s between 8-10 weeks. But when you come to the exact moment, you need to choose a perfect day for it. Most growers use a couple of signs that tell you it’s the right time to start.
Dark brown stigmas
First of all, what is the percentage of grey hair (called stigmas) compared to white ones? Around the third week in the flowering stage, you will notice lots of white stigmas growing out, and as harvest time approaches, these hairs get darker until they turn orange, red, and finally brown. As a rule of thumb, from week 8, you start to examine your plants more carefully. When you notice around 80 percent of them already red and some of them turning brown, that might be the first sign that time of harvesting cannabis has come. But it depends on the strain too. Some of them are ready when 70 percent of hairs are already brown.
A pistil is a so-called female cannabis sex organ. And tiny hair growing from them are called stigmas, which collect pollen from male cannabis plants. So even one male plant in the grow room can spread its pollen, and as soon as it comes into contact with stigmas, female plants become pollinated.

Milky amber trichomes
The next step would be to take a closer look into the color and shape of trichomes. The trichomes of a maturing plant exhibit the following visible changes:
- In the beginning, they form crystal transparent;
- Closer to the harvest, they change to cloudy and milky;
- The shape becomes more swollen and fuller, with the heads flattening and looking like a mushroom;
- The trichomes will start turning brown – so, they’ll go from clear > milky > amber.
If you notice your trichomes to be all of them milky – get ready and wait for at least the first amber ones and start the process of cannabis harvesting. Consider starting a little bit earlier if you have more than a few plants and think you will need more than a day to harvest them all.

In the end, you decide: if you want the effects to be more or less potent. Some growers harvest early when the trichomes are clear – this is desirable if you want the effects to be light. Other growers pick their plants once the trichomes show a nice milky shade – this makes for a ‘good hit’ without being too potent or heavy to bear. And then, some growers harvest when a specific portion or percentage of the trichomes have already turned amber.
The overall look of the plant
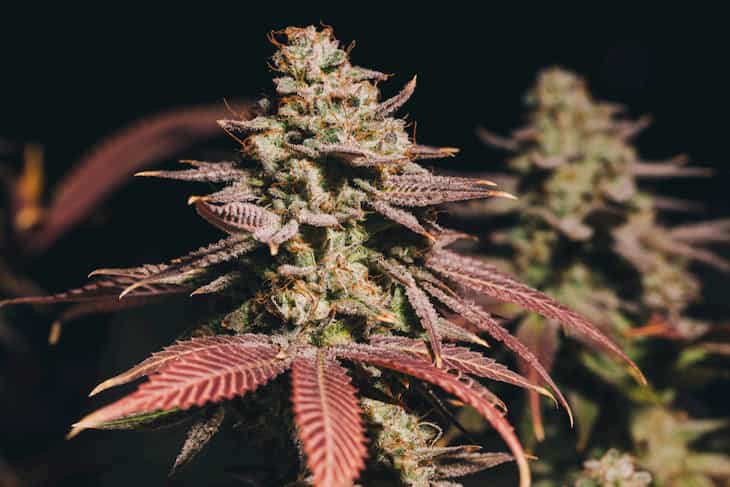
When you are growing the same strain not the first time, you already know its maturity look. Most strains will look more and more yellow, many brown stigmas, and some even start to change the color of the buds to violet. If you feel like you harvested too early last time, you may try to give a couple of days more this time. Many experienced growers can decide the right day to harvest just by looking at the tree overall.
Few things before the harvest
Whether you grow your plants in a hydroponic medium or soil, they will eventually experience a build-up of nutrient and/or salt residues. This is why many expert growers flush their cannabis plants using only water (O.4 EC and around 6.5 pH). Some even use rainwater for this.
No matter how thorough you are with their dietary requirements, plants will not immediately absorb all the nutrients, which is entirely normal. Some nutrients are utilized, while others are stored later across the stems, leaves, and buds.
This is where flushing really comes in handy. You can use flushing more than once during the whole growing period, for example, when:
- nutrients are switched (e.g., at the start of the flowering stage);
- plants are exhibiting signs of a nutrient lockout in the vegetative or too early in the flowering stages (weak-looking and flimsy with stunted growth; yellowing/curing of the leaves also indicate nutrient lockout);
- or during the last week of flowering.
Some even say that flushing before cannabis harvesting will definitely improve your buds’ quality.
During the last week of flowering, gradually increase the temperature difference between the daytime and nighttime. Many growers increase the difference even up to 50°F (10°C). For example, if the daytime temperature is around 77°F (25°C), so they are lowering nighttime temperature up to 61°F (16°C).
Cannabis harvesting time
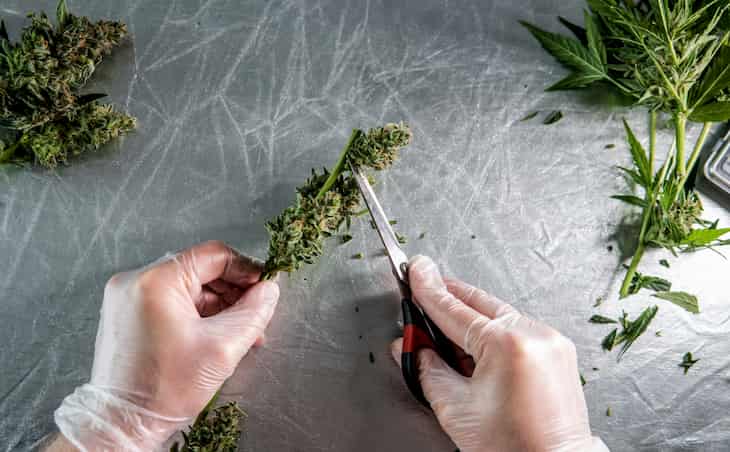
Cannabis harvesting consists of trimming and drying the plants, and it’s your own choice which to perform first. Generally, the large growers first cut the trees, trim all the colas using trimming machines, and then dry cannabis using special dryers. This method is faster, but a small part of the quality is lost during such a process. If you are a smaller grower and not in a hurry, you can take your time and do it in a way that is the best for the high-quality end product.
Preparing for drying
The first thing before drying is to get rid of the larger fan leaves from the plant. It’s essential to do this while your plant is still standing. The buds will dry a lot better when you do it in sections. Treat every branch and cola individually, ensuring they don’t come into contact as you hang them upside down to dry later. Be gentle – rough handling may damage frosty-looking trichomes. When your tree is “naked”, you should decide whether to hang the whole plant for drying or divide it into smaller parts using sharp secateurs. Most of the growers just hang the entire tree if it’s not too big and the branches are not in very close contact with each other.
Drying cannabis
Hang your harvested plants or branches upside down. Make sure there’s plenty of space between each branch/tree. The drying room should be kept in the dark, as direct light degrades the THC content. Good ventilation and airflow are essential so that a fan might be a good help. But don’t have it blowing air directly on the plants – the general idea is good air circulation.
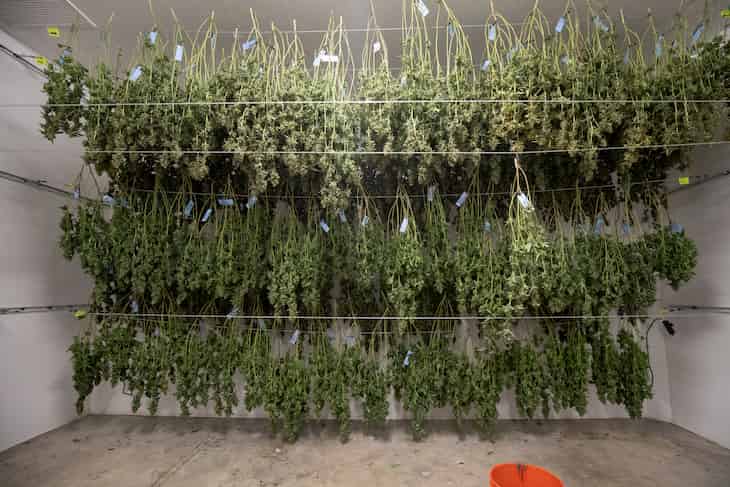
The best air temperature when drying cannabis is between 64-69°F (18-21°C). During the first day, the air humidity should be around 65%, the following couple of days 60%, and the rest of the drying days between 50-55%. In most cases, a dehumidifier with a digital controller to keep the proper humidity is very useful. Just don’t let the air from it blow directly to your plants.
Check your plants regularly to see how they are coming along. The whole process should take from 6 to 9 days. You don’t want to hurry up things – it should dry slowly and steadily. You don’t want your buds to become dry from outside and still wet inside, and it takes time and perfect conditions for it. Many growers use the same grow tents as it is easier to fulfill these conditions. You’ll know your plant has nicely dried when the branches and stems start to crack between your fingers rather than bend.
Quickly recap
- Dry your buds very slowly. Fast-drying methods will grant you ‘smokeable’ buds quickly, but they will be lightweight and bland. Always dry them slowly and naturally to preserve flavor, smell, and potency.
- Provide a good amount of ventilation and airflow. This will prevent mold and fungus from accumulating, which can otherwise ruin the entire bud.
- Cure for at least 2-4 weeks. Careful curing is paramount to bringing out the terpenes in your plants, leading to full-flavored and fantastic-smelling buds.
TIP: Before harvest, put your plants for 24 -72 hours of darkness, and it will improve potency. According to “The Stichting Institute of Medical marijuana (SIMM)”, this may increase THC levels up to 30%.
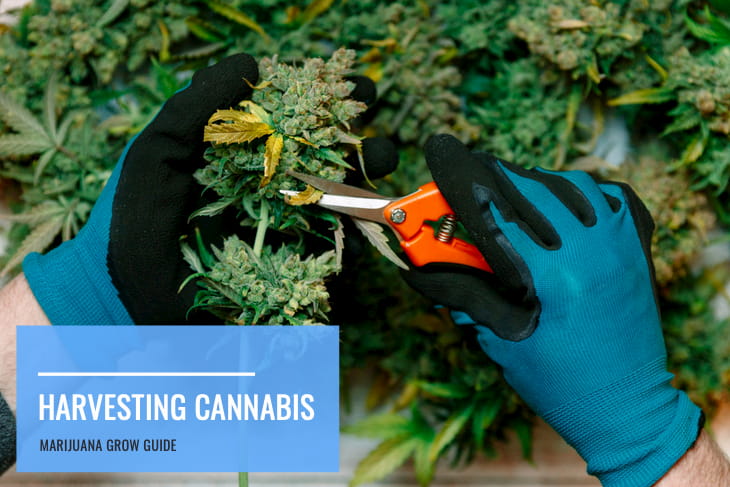
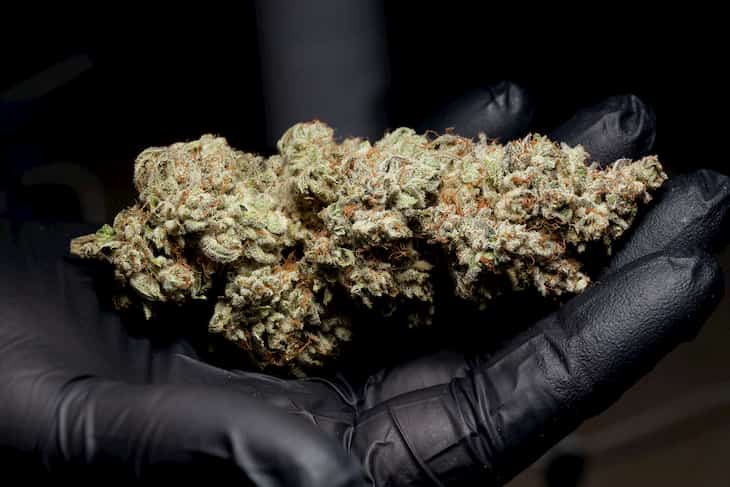
Trimming cannabis
Before performing the final cure, you need to trim your plants. Those buds need a final ‘manicure’, so use a pair of clean and sharp scissors to remove the remaining leaves.
This part of the trimming cannabis process comes down to pure aesthetics, so it’s pretty much up to you how sharply you want to trim your buds. However, the way you trim it can also influence the effects of the plant:
- The “top-shelf” appearance is what you typically see online, at dispensaries, or on a magazine cover – the kind of appearance we’ve come to associate with “good-quality marijuana”. This works fine for most growers.
- Improved smell; if you trim your buds right before tucking them away in a jar, you can enjoy stronger-smelling marijuana over time. On the other hand, untrimmed buds have a “planty”, almost hay-like smell that some prefer.
- Throat-friendly; trimming off extra leaves makes the buds smoother if you’re vaping or smoking them.
- Higher THC; trimmed buds also provide for higher THC levels per gram.
Curing cannabis
Once your buds are dry – it’s time to cure them. What is curing? Basically, it is a process when the dried plant material is appropriately aging to fine-tune the moisture content and allow for the breakdown of sugars and chlorophyll before smoking it.
For the curing process, you will need:
- Airtight jars
- Thermometer/Hygrometer (for each jar to measure temperature and humidity)
When cannabis harvesting is over and your buds are dried and properly trimmed, place them into airtight glass jars loosely, don’t squeeze them. Put a hygrometer in every jar to measure the humidity inside them and leave the jars in a cool, dry, and dark place. Light can significantly degrade terpenes.
Avoid using plastic bags – they are not impervious to oxygen and might transmit plastic taste to your buds. Just like your favorite soda drink is always tasting better from a glass bottle.

After a couple of days, your buds should get a little softer as left moisture from the inside of the buds spreads to the outer parts. If not, you probably over-dried your cannabis. Usually, the humidity inside the sealed jar should be around 55-60%. In case your buds are over-dried, you can add a humidity pack.
During the first two weeks, open the jars once a day for a couple of minutes. It helps to release moisture and allows the oxygen to come inside the container. This process is sometimes called burping.
If you smell ammonia when opening the container, this might be a sign that the buds are too wet, and the anaerobic bacteria are consuming them, leading to moldy and rotten stuff. Leave the lid open for 24 hours before closing again.
For the next week, burp the jars less frequently, 2-3 times per week. The whole curing process should take around 3-4 weeks.
Storing your cannabis
After the curing process is done, you can store your stuff for 1-2 and not lose much potency. But it has to be kept in a cool, dry (between 55-65%) and dark place. The perfect temperature is around 69-73°F (20-23°C). The worst enemies, mildew and other molds, thrive in temperatures between 77-86°F. For more extended storage, vacuum seal jars to minimize oxygen exposure.
We hope this guide will help you to prepare and enjoy the process of cannabis harvesting. And the whole cycle of our guides Cannabis growing supplies, Cannabis germination and seedling, Cannabis vegetative stage and Cannabis flowering stage will help you to learn and get better yields.
Frequently Asked Questions (FAQs)
Does curing really affect potency?
100%! The proper curing process not only improves the flavor but the potency of the bud as well.
What tools are needed for cannabis harvesting?
The matured cannabis plant is very sticky because of the trichomes. So when you need to deal with more than one plant, the disposable microporous coverall is a must. For the same reason, medical gloves are essential too. For the harvest itself, you will need a pair of scissors and secateurs.
